
Your car’s alternator is one of those components you rarely think about—until something goes wrong. A dim dashboard, a dead battery, or strange electrical behavior can all point to alternator trouble. Fortunately, you don’t always need expensive diagnostic tools or a mechanic’s visit to get answers. Learning how to test an alternator using a multimeter is a practical skill that can save time, money, and stress.
This guide is designed for everyday drivers and DIY enthusiasts who want a clear, human-friendly explanation of multimeter alternator testing. Whether you’re new to automotive maintenance or simply curious about electrical diagnostics, this article will walk you through everything you need to know.
Understanding the Alternator’s Role in Your Car
Before you learn how to test a car alternator with a multimeter, it helps to understand what the alternator actually does. Simply put, the alternator converts mechanical energy from the engine into electrical power. This power runs essential systems such as lights, infotainment, sensors, and charging ports—while also recharging the battery.
When an alternator starts to fail, the battery is forced to carry the electrical load alone. Eventually, the battery drains, leaving the car unable to start or function properly.
Common Signs of Alternator Problems
Many drivers confuse alternator problems with battery issues. While the symptoms can overlap, there are a few warning signs that often point directly to alternator trouble:
- Dashboard battery warning light stays on
- Headlights dim or flicker while driving
- Electrical accessories behave inconsistently
- Burning rubber or electrical smell
- Frequent dead batteries despite being new
If you notice these symptoms, it’s time to perform multimeter alternator testing to confirm the issue.
Why Use a Multimeter for Alternator Testing?
A multimeter is one of the most versatile tools in automotive electrical diagnostics. It measures voltage, current, and resistance, making it ideal for alternator testing. The best part is that digital multimeters are affordable, easy to use, and widely available.
Testing an alternator with a multimeter gives you:
- Immediate results
- Accurate voltage readings
- A clear understanding of your charging system’s health
- Confidence before replacing expensive parts
Learning how to test an alternator using a multimeter empowers you to diagnose issues logically rather than guessing.
What you’ll need before Testing
Before you begin, gather a few basic items:
- A digital multimeter
- Safety gloves (recommended)
- Eye protection
- Access to the vehicle’s battery and alternator
Make sure your vehicle is parked on a level surface with the parking brake engaged.
How to Test an Alternator Using a Multimeter: Step-by-Step
Let’s break down the process of testing a car alternator with a multimeter in a clear and beginner-friendly way.
Step 1: Set the Multimeter Correctly
Turn your multimeter to DC voltage (marked as V with a straight line). Choose a range above 15 volts if your meter is not auto-ranging.
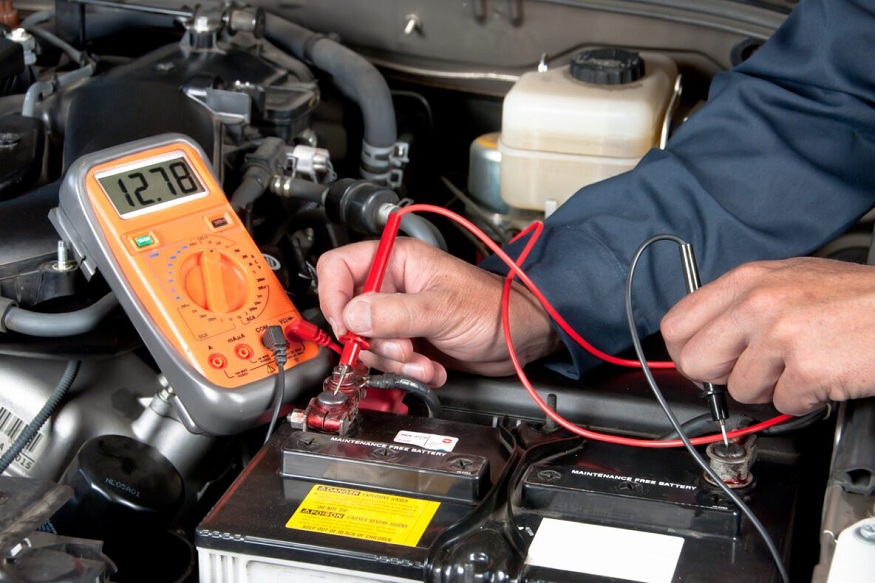
Step 2: Test Battery Voltage (Engine Off)
With the engine off, place the red probe on the battery’s positive terminal and the black probe on the negative terminal.
A healthy battery should read around 12.6 volts. If it’s significantly lower, the battery may already be weak, which can affect alternator test results.
Step 3: Start the Engine and Test Again
Now start the engine and repeat the voltage test at the battery terminals.
A properly working alternator should raise the voltage to 13.7–14.7 volts. This increase confirms that the alternator is charging the battery.
Step 4: Apply Electrical Load
Turn on headlights, air conditioning, and radio to put stress on the system. Check the voltage again.
If the reading stays within the normal charging range, the alternator is handling the load well. A drop below 13 volts may indicate a failing alternator.
Testing Alternator Output at the Alternator Itself
For more advanced automotive electrical diagnostics, you can test directly at the alternator. This step helps identify wiring or connection problems.
With the engine running:
- Touch the red probe to the alternator’s output terminal
- Touch the black probe to a clean metal ground
The voltage reading should match what you see at the battery. If there’s a large difference, the issue may be with wiring rather than the alternator itself.
Common Mistakes to Avoid When Testing an Alternator
While multimeter alternator testing is straightforward, a few mistakes can lead to confusion:
- Testing with a weak or dead battery
- Using the wrong multimeter setting
- Touching probes incorrectly
- Ignoring loose or corroded battery terminals
Taking a few extra minutes to prepare ensures accurate results.
Alternator Testing vs. Battery Testing
It’s important to remember that alternators and batteries work together. A failing battery can mimic alternator problems, and vice versa. That’s why professional automotive maintenance often includes testing both components.
If your alternator tests fine but issues persist, consider having the battery load-tested or checking the serpentine belt that drives the alternator.
How Alternator Testing Fits into Preventive Maintenance
Regular alternator testing is part of smart automotive maintenance. You don’t need to test it every week, but periodic checks—especially before long trips—can prevent breakdowns.
Preventive testing helps you:
- Catch problems early
- Avoid unexpected towing costs
- Extend battery life
- Maintain reliable vehicle performance
Knowing how to test a car alternator with a multimeter puts control back in your hands.
When to Seek Professional Help
While DIY testing is valuable, there are times when professional electrical diagnostics are necessary. If your readings are inconsistent or your car shows multiple electrical issues, a trained technician can perform deeper tests, including ripple voltage and load analysis.
Still, having basic test results helps you communicate more effectively with mechanics and avoid unnecessary repairs.
Final Thoughts: Confidence through Knowledge
Understanding how to test an alternator using a multimeter is one of the most useful skills any car owner can learn. It transforms a confusing electrical problem into a clear, logical process. With a simple multimeter and a few minutes of time, you can diagnose charging system issues, make informed decisions, and keep your vehicle running reliably.
Automotive maintenance doesn’t have to feel intimidating. When you approach electrical diagnostics with knowledge and patience, even complex systems like alternators become manageable. The next time your dashboard lights flicker or your battery struggles, you’ll know exactly where to start—and that confidence is just as powerful as the alternator itself.